Showing posts with label fruit. Show all posts

2.2.13

Aaand I Am Back in the Game!


Oh hello

It’s been a while, my dears.
I have missed you, I have missed the kitchen, and I have missed being vegan.

Yep, that’s right, during my travels I decided to lapse from a strictly vegan diet for a little while. I know I know, but I’m supposed to be SO vegan. However, I really wanted to be able to fully immerse myself into new places and new cultures, and if that meant trying the local cuisine, which usually happened to include eggs or meat, I wouldn’t say no. Hey, nobody is perfect. But I have missed the lighter, healthier feeling I had when I didn’t eat animal products. I am still a vegan at heart and everything I cook and bake for myself and on this blog will always be animal-free.

If you have been keeping up with my travel blog, you will know that right now I’m writing from somewhere far from my tiny college kitchen, far from my hometown kitchen in Minneapolis, and for that matter so far from anything and everything in my previous life. I am writing from Morocco- the wonderfully strange city of Tangier, to be exact. 


I have been living here for 3 weeks now, interning at the Cinematheque de Tanger and exploring the tiny winding streets, overflowing food markets, and beautiful ocean vistas.

The markets here are really what inspired me to start blogging again. I have never seen so much gorgeous, fresh, and sinfully cheap produce in my entire life, so I figured I had better make use of it! There’s only one problem with starting up a blog dedicated primarily to baking while I’m here…

I have no oven in my apartment.

Some friends who live nearby have one, so maybe once in a while I can sneak a cake down the street, but otherwise you may be seeing a lot of no-bake desserts. Time to get creative.


Like I said in the very very beginning (oh god, what a long time ago), let’s start simple.


4 Ingredient Chocolate Orange Mousse

makes 4 small servings

200 g bittersweet chocolate (I used sweetened chocolate, but if yours isn’t very sweet you may want to add some agave or other sweetener to the recipe)
1 ½ avocados
½ tsp orange zest
1-2 tbsp non-dairy milk

Break up the chocolate and place it in a microwave safe bowl. Microwave for about 2 minutes or until the chocolate is completely melted. In a food processor, spoon out the avocado flesh and puree until smooth. Add melted chocolate, orange zest, 1 tbsp of non-dairy milk and blend. If the mixture seems too thick (it should be pudding consistency) add another tbsp of milk. Scrape the mousse into a bowl and let it chill for about 1 hour. Serve topped with chocolate shavings, walnuts, or more orange zest.


If you are curious about where else I have been in the world so far, check out my other blog Wanderment. I will continue to update it with my traveling adventures, while That’s So Vegan will once again document my food adventures. I am so happy to be back!


Oh, and can you tell I'm getting ready for Valentine's Day? 

16.7.12

Blueberry Molasses Cake with Lemon Icing


When life slows down a bit, it is nice to be able to indulge in simpler pleasures. It's been a while since I made a link-love list for you guys, so I figured it's time to share the things I have been enjoying these days...

-Roasted berries, especially in this incredible looking frozen yogurt from Oh, Ladycakes
-Simple, gorgeous life photography
-Snail mail: sometimes it's fun doing things the old fashioned way
-This song. Her voice is incredible.
-I've been dreaming about chocolate lately. This should cure the craving. Holy jesus.
-I want to learn how to salsa dance. I could totally do that in those heels. No problem.
-This video cracks me up because it is the truth.
-Take me to this bizarre and beautiful lake.

Aaand I've been loving this cake. 


Always cake.


Blueberry Molasses Cake with Lemon Icing

makes 8-12 servings

Cake:


2 1/4 cup flour
1 1/2 tsp baking powder
1 tsp cinnamon
1/4 tsp nutmeg
1/2 tsp ground ginger
1/4 cup applesauce
1/4 cup canola oil
1/4 cup molasses
1/2 cup maple syrup
1 cup non-dairy milk
1 1/2 cup blueberries

Icing:

1/4 cup non-dairy milk
1/3 cup vegan margarine
1/4 cup granulated sugar
zest of 1/2 a lemon
1 tbsp lemon juice
1/2 cup powdered sugar

1. Preheat your oven to 350º and grease and flour a 9" round cake pan.

2. In a large bowl, combine the flour, baking powder and spices. Set aside and whisk together the remaining ingredients (minus the blueberries) in a smaller bowl. Add the wet to the dry and stir until just combined.


3. Pour the batter into your prepared pan and sprinkle the blueberries on top. Bake for about 30-40 minutes or until a toothpick stuck in the center comes out clean.
4. While the cake bakes, prepare the frosting. Cream together the margarine and sugar. Stir in the soy milk, lemon juice and lemon zest and finally the powdered sugar. Mix until smooth and creamy.
5. Let the cake cool completely before flipping onto a plate and pouring the icing over the top. Slice and enjoy!


I hope everyone is having a great start to the week! What little things have you been loving lately? 

4.7.12

Red, White & Blueberries


The greatest thing about living in the same house for your whole life is the consistency and comfort of neighborhood traditions. Ever since I can remember, my community gets together every 4th of July for a parade around the block complete with instruments, goofy hats, flags and kids on decorated bicycles. I've grown up with this parade...


from being wheeled around in a star-spangled wagon,


 to having lemonade with friends,


trying to rollerskate and getting mad when I fall too many times


and eating ice cream with my old baby-sitter who will always be Peter Pan in my mind.


Now it feels so bizarre to be practically one of the adults in the parade. The past three years I'v walked around with the newest generation of Bryn Mawr kids, helping them with their rollerskates and bikes. 

I'm starting to feel old.

But you are never too old for fireworks.


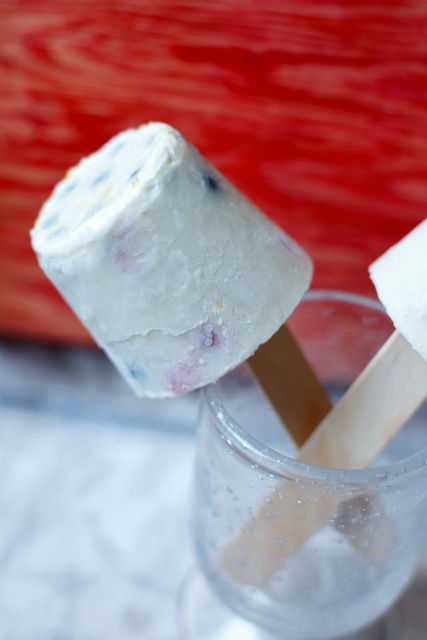
Or holiday-themed popsicles. Obviously.


Red, White & Blueberry Lemon Coconut Pops

makes 4-5 popsicles

1 can light coconut milk
1/4 cup maple syrup or agave
zest of 1 lemon
1/4 cup shredded coconut
1/2 cup diced strawberries
1/2 cup fresh blueberries

Whisk together all of the ingredients in a medium bowl, pour into popsicle molds and chill for at least 6 hours or overnight.

Simple, lovely and delicious.


Happy 4th of July!

5.6.12

Orange Blueberry Pecan Cake


Summer is a strange time of year. When my brain goes out of school mode and my thoughts float around without any structure, sometimes I start to feel kind of aimless. So then I make lists to organize things again. 

Things I Don’t Like About Summer:
-boredom
-mosquitoes
-being away from college friends
-trying to find a job

Things I Like About Summer:
-boredom, because it leads to creativity
-being outside in the sun almost every day
-reading books for fun
-beaches
-bike rides
-having a stocked kitchen at home
-driving with the windows down
-night swims
-fresh berries

Looks like the pros outweigh the cons… I guess summer isn’t really so bad overall!


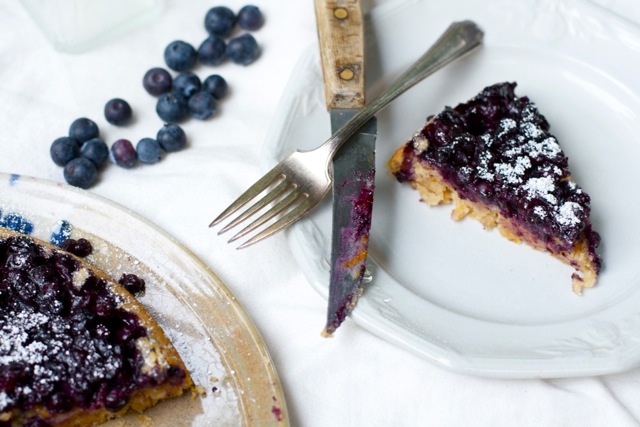
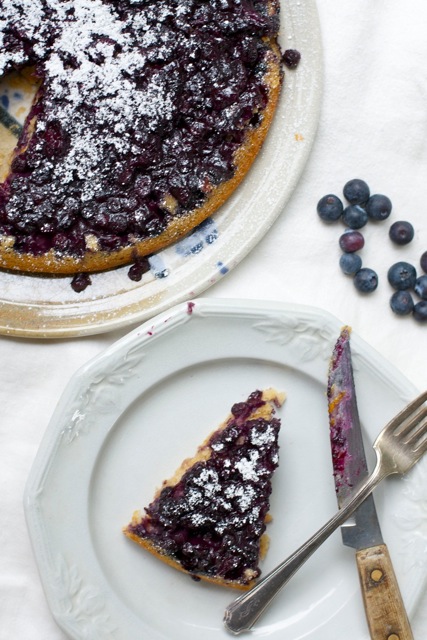
You know what also isn’t so bad? This cake. Oh wait, that’s an understatement. This cake is incredible. I swear, you will not be disappointed by the flavors and the delicious pie-like topping. Plus, you know how I feel about making anything upside-down.


Orange Blueberry Pecan Cake

Topping:
1 1/2 cup fresh or frozen blueberries
1 tbsp melted earth balance
1 tbsp flour
2 tbsp brown sugar
1/2 cup crushed pecans
1/2 tsp cinnamon

Cake:
1/2 cup non-dairy milk
1 tsp apple cider vinegar
1/4 cup applesauce
1/4 cup melted earth balance
1/4 cup orange juice
zest of 1 orange
1/4 tsp vanilla
1/3 cup maple syrup
1 1/4 cup all-purpose flour
2 tsp baking powder
1/2 cinnamon

1. Preheat your oven to 375º. To prepare the "topping," toss blueberries in a small bowl with the flour, sugar, pecans and cinnamon. Pour the melted earth balance evenly over the bottom of a 9" round pan and sprinkle the blueberry mixture on top. Set aside.
2. To make the cake, mix together the milk and vinegar in a large bowl and let sit for 3-5 minutes to curdle. Whisk in the applesauce, earth balance, orange juice, zest, vanilla and maple syrup. Add the flour, baking powder and cinnamon and stir until just combined- it's okay if there are a few lumps.
3. Spread the batter over the blueberry-pecan mixture and bake for about 35-40 minutes or until the top is golden brown.
4. Let cool for at least 15 minutes before carefully flipping onto a large plate. Serve with a dusting of powdered sugar.


I highly recommend enjoying this cake with a tall glass of iced tea, sitting on a porch or outside on a sunny afternoon, listening to this song. You will be refreshed.


How do you feel about summer?

20.4.12

Grapefruit & Yogurt Scones


Here is what I have discovered: spring makes me restless. 

I guess they don't have the saying "spring fever" for nothing, but I've never noticed it so clearly before! I'm just so sick of my old routine- it's time to do new things, go new places, create, get inspired... 

But I still have four weeks of school.

Not that I can't do any of those things in college- that's what college is for, isn't it? It is just a tiny bit harder when you have exams and paper deadlines and such. I guess I have to cure my spring fever in little ways. When my feet get restless: go get a studio and dance. When my mind gets restless: focus on a good book (I just started this one!). 

When my hands get restless: bake scones and make them delicious.


Done and Done.

Grapefruit & Yogurt Scones (loosely adapted from Joy the Baker)

makes 6 scones

1 1/2 cups all-purpose flour
1/4 cup maple syrup
2 1/2 tsp baking powder
1/4 tsp salt
6 tbsp margarine
1 grapefruit, zested and cut in half
1/2 cup soy yogurt (plain or vanilla)

1. Preheat your oven to 425º and line a baking sheet with parchment paper. 
2. Whisk together the flour, baking powder, grapefruit zest and salt in a large bowl. Add in the margarine and using your fingers, crumble it into the flour mixture until combined. 
3. Mix in the maple syrup and yogurt. Cut out each segment of the halved grapefruit, as if you were eating it out of a bowl, and fold them into the batter. 
4. Place the dough onto the cookie sheet and form it into a circle with an 8 inch diameter. Sprinkle the top with sugar, if you like, and cut the circle into 6 pieces. Bake for about 20 minutes, or until the tops and edges begin to brown. Serve warm with a cup of tea!


These use such simple ingredients and are the perfect mix of sweet and tart. They are a little moister than most scones because of the grapefruit juices, but still have that wonderful flakey and crumble-y texture.


Do you get spring fever?

3.4.12

Lime & Blackberries & A Whole Lotta Blog Love


Is your mouth is watering yet? Mine sure is just remembering the taste of these incredible cupcakes. But you're just going to have to hold your horses for a bit because before I share my recipe, I would like to thank Jesica from The Pencil Kitchen for honoring me with a Kreativ Blogger Award! She is one of my oldest and most loyal followers, so I really appreciate the gesture :)


Here's how this award works, I share 7 interesting facts about myself and then pass the award along to 7 other bloggers who I admire.

Here are several interesting things about me that may have not come out yet on this little blog...

1. I have this weird habit where instead of actually laughing out loud when something funny happens, sometimes I'll just wiggle my shoulders up and down and smile. No idea why.
2. I wear cowboy boots about every other day. They're my power boots: super worn-in and comfortable, but look pretty badass (in my head, at least...)
3. Peter Pan is my absolute favorite story in the world. Period. Not many stories or movies make me cry, but Peter Pan does every single time.
4. When I'm in a bad mood or stressed out, I tend to blast loud & dirty rap music while I bake something with chocolate. It' a nice contrast :)
5. I have synesthesia, which means that I associate people, letters and numbers with different colors. It sounds kind of hokey, but when I meet people and get to know them it's almost as if they radiate a certain color!
6. My brother ran away with the circus. Okay, he didn't run away, but he goes to circus school after his normal high school classes 6 days a week. I am simultaneously proud and jealous of his life.
7. I love to read. I tend to bring books or a newspaper or something with me wherever I go on campus, just in case I have a couple minutes of downtime. I even had a shirt in 5th grade that said "Serious Reader." Obviously, I was the coolest kid in school.

Aaaaand the fun part, here is who I get to pass on the award to (in no particular order):

1. Peaceful Plate: Noelle always has such gorgeous photos and delicious recipes! I have tried a few of them and they have never failed. I love her down-to-earth voice, too.
2. The Tomato Tart: I can't believe Sabrina has only had this blog going for less than a year! It is so beautifully put together and has some of the most mouth-watering photos. For example, I have been drooling over this pumpkin and chocolate cake forever- I've got to get around to making it soon.
3. Cookies for Alligator: I'm a sucker for any vintage-looking photo taken with a 35mm, and this girl has got some beauties. Her pictures and recipes are so original, as is her open and honest blogger voice. 
4. Hungry Gnomes: These ladies are some of the funniest bloggers I've ever seen. I love the stories they share to go along with each recipe (which always look delicious, by the way). A few of their posts have actually made me laugh out loud!
5. Oh, Ladycakes: I have always loved the clean, fresh look of her blog. Her recipes are usually fairly simple and so beautifully presented! The name Ladycakes is downright adorable, too.
6. Scissors and Spice: I love how this blog combines crafts and food. She is so endlessly creative- I don't know how she does it along with keeping up her own etsy store!
7. Papillon: I love the artful simplicity of this blog. It really lets the pictures stand out, which is great because they never cease to be absolutely stunning.


Okay. Now back to the food. My mom showed me a non-vegan version of these cupcakes on Pintrest and I fell in love. I decided I had to make them that very night, so I did, and they were amazing. Seriously. I know I say a lot of things are my favorite, but the flavor combo of fluffy and moist lime cupcakes with tart and creamy blackberries really just can't be beat.


Key Lime Cupcakes with Blackberry Filling and Blackberry Buttercream Frosting (inspired by Baked Perfection)

makes 1 dozen cupcakes

Cake:


1 1/4 cup flour
1/2 tsp baking powder
1/2 tsp baking soda
1/4 tsp salt
1/2 cup earth balance
3/4 cup sugar (these are very sweet, so feel free to adjust this slightly to your taste)
3 tsp egg replacer mixed with 1/4 cup water
juice from 1 lime
zest from 1 lime
1 tsp vanilla
1 cup plain soy yogurt

Filling:

3 cups frozen blackberries
2 tbsp sugar
2 tbsp fresh-squeezed lemon juice
2 tbsp cornstarch
pinch of salt

Frosting:

1/2 cup earth balance
1/2 tsp vanilla
1/4 cup blackberry filling
3 cups powdered sugar

1. Dump the frozen blackberries in a bowl and sprinkle with sugar. Let them thaw while you prep your cupcakes. 
2. Preheat the oven to 350º and line a cupcake tin. In a medium bowl, combine the flour, baking powder and soda and salt. In a separate larger bowl, cream together the earth balance and sugar until fluffy. Whisk in the egg replacer, then add the lime juice, zest, and vanilla. 
3. Slowly add the flour mixture to the larger bowl, alternating with stirring in the soy yogurt. Mix until combined. Pour the batter into the cupcake tin, filling the cups about 3/4 of the way full.  Bake for about 25-30 minutes or until a toothpick comes out clean (ovens may vary, so check after 20 minutes if yours tends to bake things faster).


4. While the cupcakes are baking, prepare your filling and frosting. Once the blackberries have thawed completely, drain them to get rid of the excess liquid, but save this liquid in a measuring cup. Add water to the blackberry liquid until it reaches 1 cup. Place the drained berries in a mesh sieve and mash them thoroughly, leaving the seeds behind and set this aside. In a saucepan, mix together the blackberry liquid, lemon juice, cornstarch and salt. Stir until it begins to boil and thicken. Remove from heat and pour in the rest of the mashed blackberries (excluding the seeds) and let cool.
5. To make the frosting, cream together the earth balance, vanilla, and blackberry filling. Whisk in the powdered sugar, 1 cup at a time, until thick and creamy.


6. When the cupcakes are done baking, let them cool for about 20-30 minutes, then time to fill 'em up! Grab a Ziploc bag and fill it with about 1/4 cup of the blackberry filling. Cut off one of the corners of the bag to make a tiny hole where you can squeeze the filling out. Poke a hole in the top of each cupcake and use a knife or your finger to dig a little well in the center. Squeeze in the filling until it starts to bubble out of the top. Repeat for each cupcake- you may need to refill the bag a couple times. Top with a thick layer of buttercream frosting and a fresh blackberry!


If you have leftover filling (I had about a cupful!) it is super delicious swirled into your morning oatmeal or yogurt with some extra berries on top.


We served these to my cousin and her husband when they came over for dinner... and all twelve were gone in about an hour. Needless to say, they were a huge hit. 


12.3.12

Wanderlust & Brownies


Remember how I said I had really exciting news? Well it’s finally official:

I am taking a leave of absence from school to travel around Europe all by myself for a whole year.

I am actually bursting with excitement. It’s hard to focus on anything else except planning and fantasizing!


So far, I have an internship in London this summer working for a small theater company doing arts administration-type stuff. From there, I will travel to Paris in mid-September where I’m hoping to find some kind of au pair position, then on to Spain, Italy and Greece. I’ll be getting a student Eurail pass, so who knows where else I could end up on the way to these main destinations!

I’m still deep in the process of organizing all of this and getting tickets and such, but it’s coming along really well! I’ve been considering the possibility of taking a year to travel for a while and next year just felt like the right time. I’m one of those people who gets antsy when I stay in one place doing the same thing for too long. I need a big change in my life, so I am taking a leap of faith and pushing myself out of my comfort zone. I’m terrified, obviously, but also ecstatic.


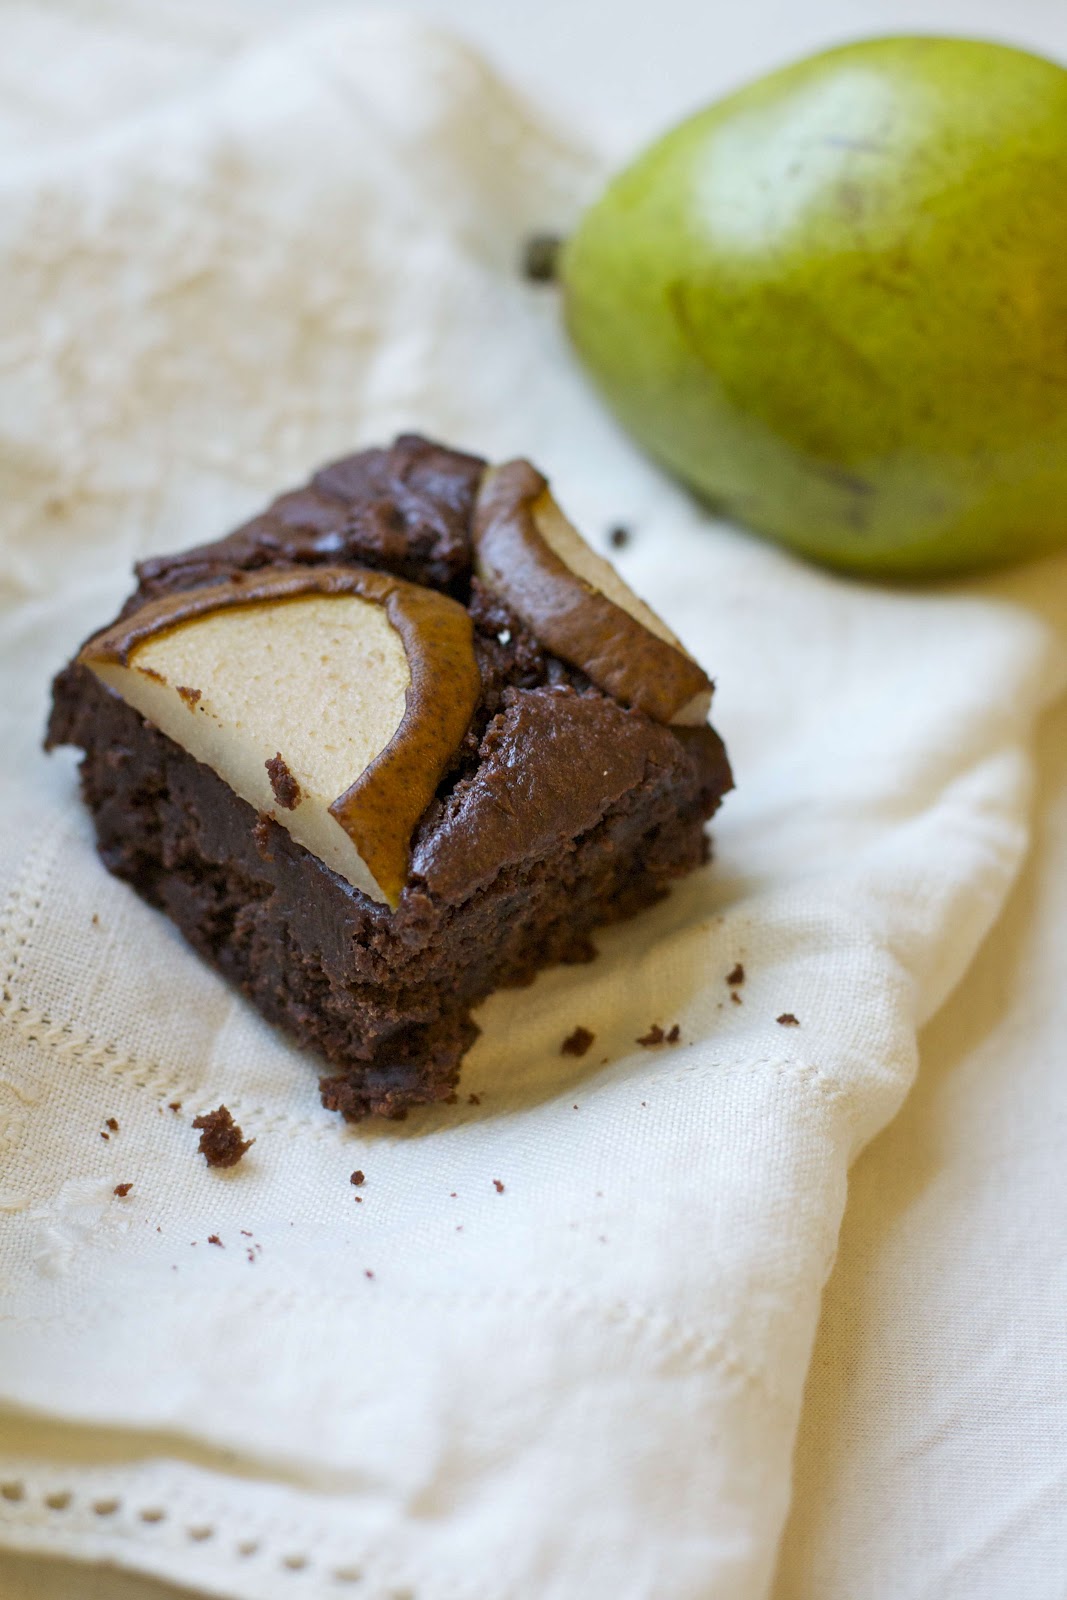
Making plans and doing research has been so much fun, but also so time consuming. However, I am a firm believer that no matter how crazy things get, you should always leave a chunk of time in your schedule for chocolate. In this case, chocolate, cinnamon and pear brownies. Trust me, these are 100% worth the procrastination.


Pear Cinnamon Brownies 

makes about 9 brownies

1 cup sugar
3/4 cup applesauce
2 tbsp water
2 tbsp canola oil
2 tsp vanilla
1 cup all-purpose flour
1/3 cup whole wheat flour
2/3 cup cocoa powder
3/4 tsp baking powder
1/2 tsp cinnamon
optional: 1 cup chocolate chips
1 pear, cored and sliced vertically

1. Preheat your oven to 350º and grease an 8x8 inch pan.
2. In a large bowl, whisk together the sugar, applesauce, water, oil and vanilla. Stir in the flours, cocoa powder, baking powder, cinnamon and chocolate chips (if you're using them. Unfortunately I couldn't due to the fact that my friends ate my whole bag during a study session the other night. Thanks, guys). 
3. Pour the batter into your prepared pan and smooth the top with a spatula. Place the pear slices on top in a pleasing arrangement and bake for about 45 minutes-1 hour or until a toothpick comes out clean. Cool for 10 minutes before serving. Unless, like me, you enjoy eating them hot, gooey and messy :)


I brought these as a treat for the performers in the dance I'm choreographing- the pan was clean within minutes :)


I'll keep you updated on the progress of my travel plans! Let me know if any of you experienced travelers have any handy tips, tricks or resources I should know about!

15.1.12

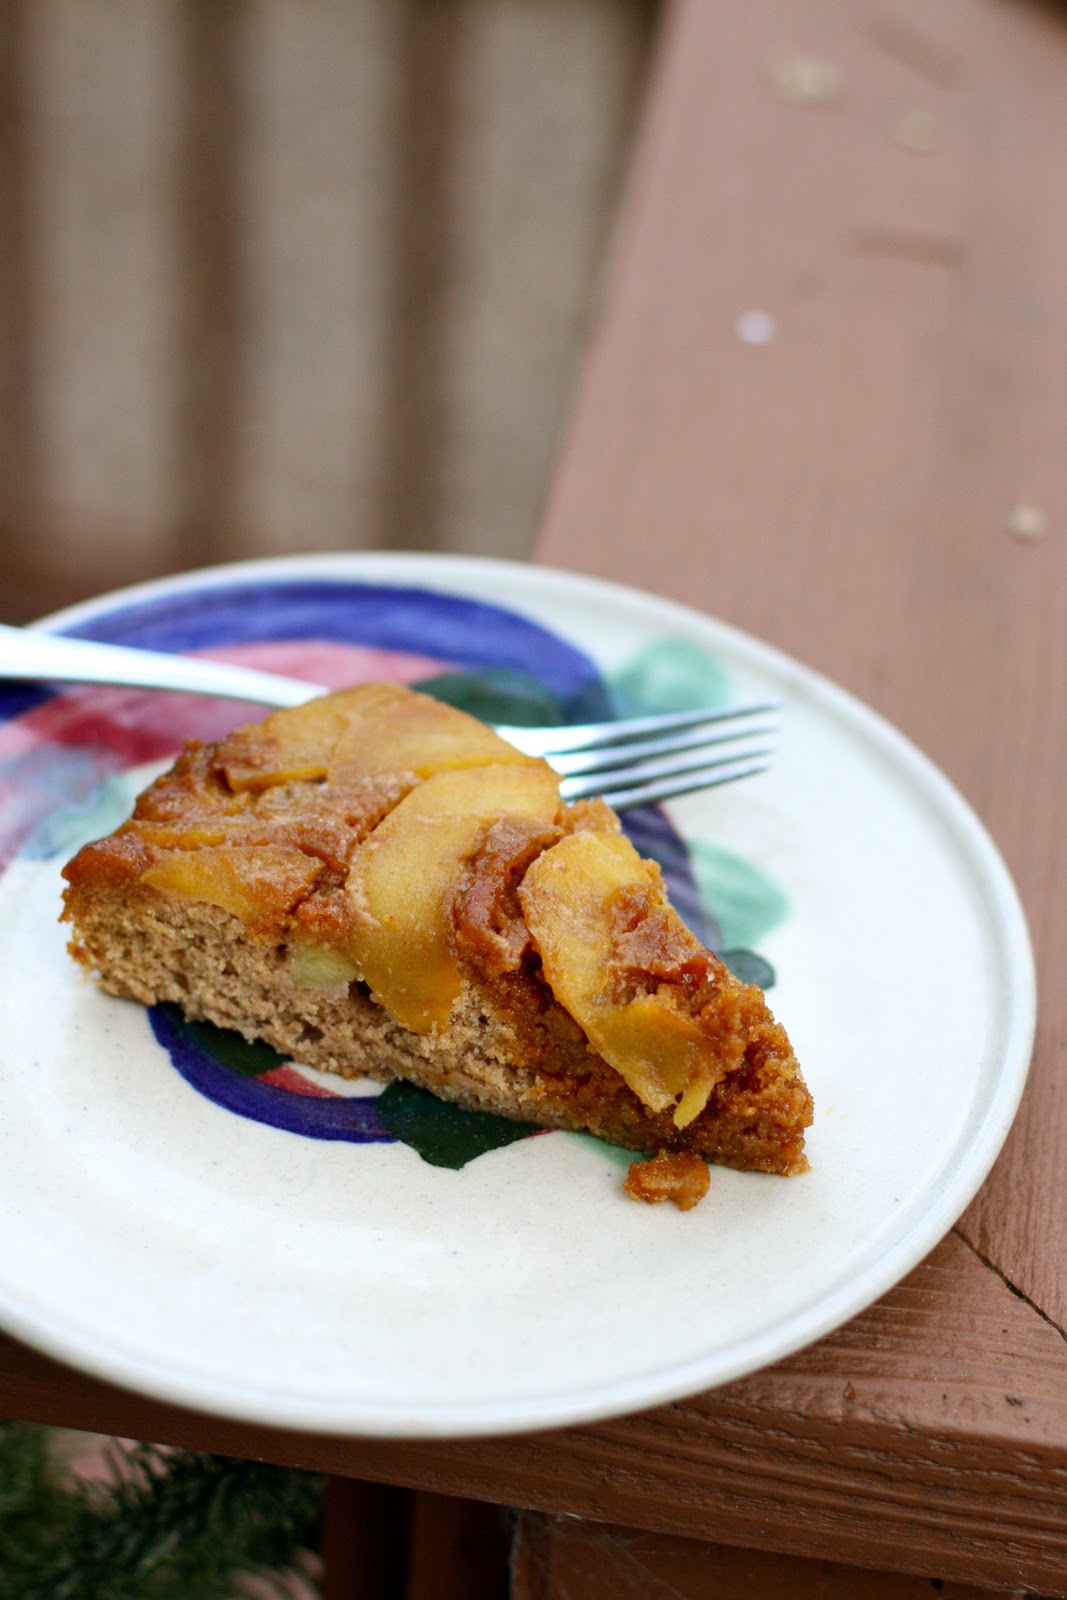
Caramel Apple Upside-Down Cake


Well this is turning out to be one of the most random internships I could have imagined. Yesterday I spent all day folding origami butterflies for a monarch exhibit and scanning pictures of wildflowers from the 1940s. Today I folded more butterflies and cut out little magnetic pictures of plankton. 


Among these funny little crafty things I'm doing, I am learning some interesting stuff about the inner workings of museum curation and the collection of local natural history. Plus I get to go to the Pacific Grove monarch sanctuary and film and take pictures of the butterflies as part of my job... not too shabby!


When I'm not working, I'm off exploring Monterey, shopping at little thrift stores, and cooking and baking with my friends who are hosting me! My friend Maria, who is an expert baker and has even made award-winning cookies, has never actually tried vegan baking before. I knew I had to find an incredible recipe to prove that baked goods can be just as delicious without all the dairy and eggs. Angela's Caramel Apple Upside-Down Cake turned out to be the perfect thing.

Unfortunately, Trader Joe's does not carry brown rice syrup, so we used a different recipe for vegan caramel. The cake still came out amazing- everyone in the house was blown away!


Caramel Apple Upside-Down Spice Cake

For the caramel (adapted from The New Vegan Table):

1 cup sugar
1/4 cup water
2 tbsp maple syrup
1/4 cup earth balance
3/4 cup soy creamer
1/2 tsp vanilla

For the cake (from Oh She Glows): 

4 apples (we used sweet fuji apples- yum!), peeled and sliced thinly

1/2 cup earth balance
1/2 cup sugar
1/3+1/4 cup maple syrup
1 cup soy milk
1 tsp vanilla extract
2 1/4 cups all-purpose flour
1 tsp baking soda
3/4 tsp baking powder
1/2 tsp salt
2 tsp cinnamon

1. To make the caramel, stir together the sugar, water and maple syrup in a medium sauce pan over medium heat. Bring to a boil and let cook until it reaches 248º. Carefully add the earth balance and soy creamer and whisk quickly. Lower the heat and stir for about 2-3 more minutes. Remove from heat and let cool for about 5 minutes.

2. Grease a 9-10" round pan and once the caramel has cooled slightly, pour about 2/3 of the batch over the bottom of the pan. Place apple slices on top, layering them if necessary. 

3. Preheat the oven to 325º. With a mixer or by hand, mix the earth balance and sugar until fluffy. Whisk the wet ingredients together in a small bowl, and combine the dry in a medium bowl. 

4. Alternate adding the wet and dry ingredients to the butter and sugar, mixing well as you go. Pour the batter over the caramel and apples and spread evenly with a spatula. 

5. Bake for about 45 minutes or until a toothpick comes out clean. Let cool for about 10-20 minutes, then flip onto a plate and pour the rest of the caramel sauce on top. Serve and enjoy!


This cake is warm and comforting on a chilly day!