30.1.12

Goodbye Butterflies


Saturday was the last day of my internship at the Pacific Grove Natural History Museum. While some of the projects they had me doing were slightly random, overall it ended up being a great experience. In the last couple weeks, they began to give me more substantial assignments when they saw what I could do with photoshop and design. The director of the museum had me create posters for their upcoming exhibits, brochures for a big fundraising event, and a sign to honor all of the museum donors. She referred to me as the official "graphic design intern," which is pretty cool :)

I wish I could be here to see the monarch exhibit opening in March. I think it's going to be a really fun, interactive, multimedia display. It's amazing to see the amount of work and attention to detail that goes into this kind of production. The exhibition curator and I spent a long time just picking out a font from 3 very similar choices to go on the inside of the advertising flyers!

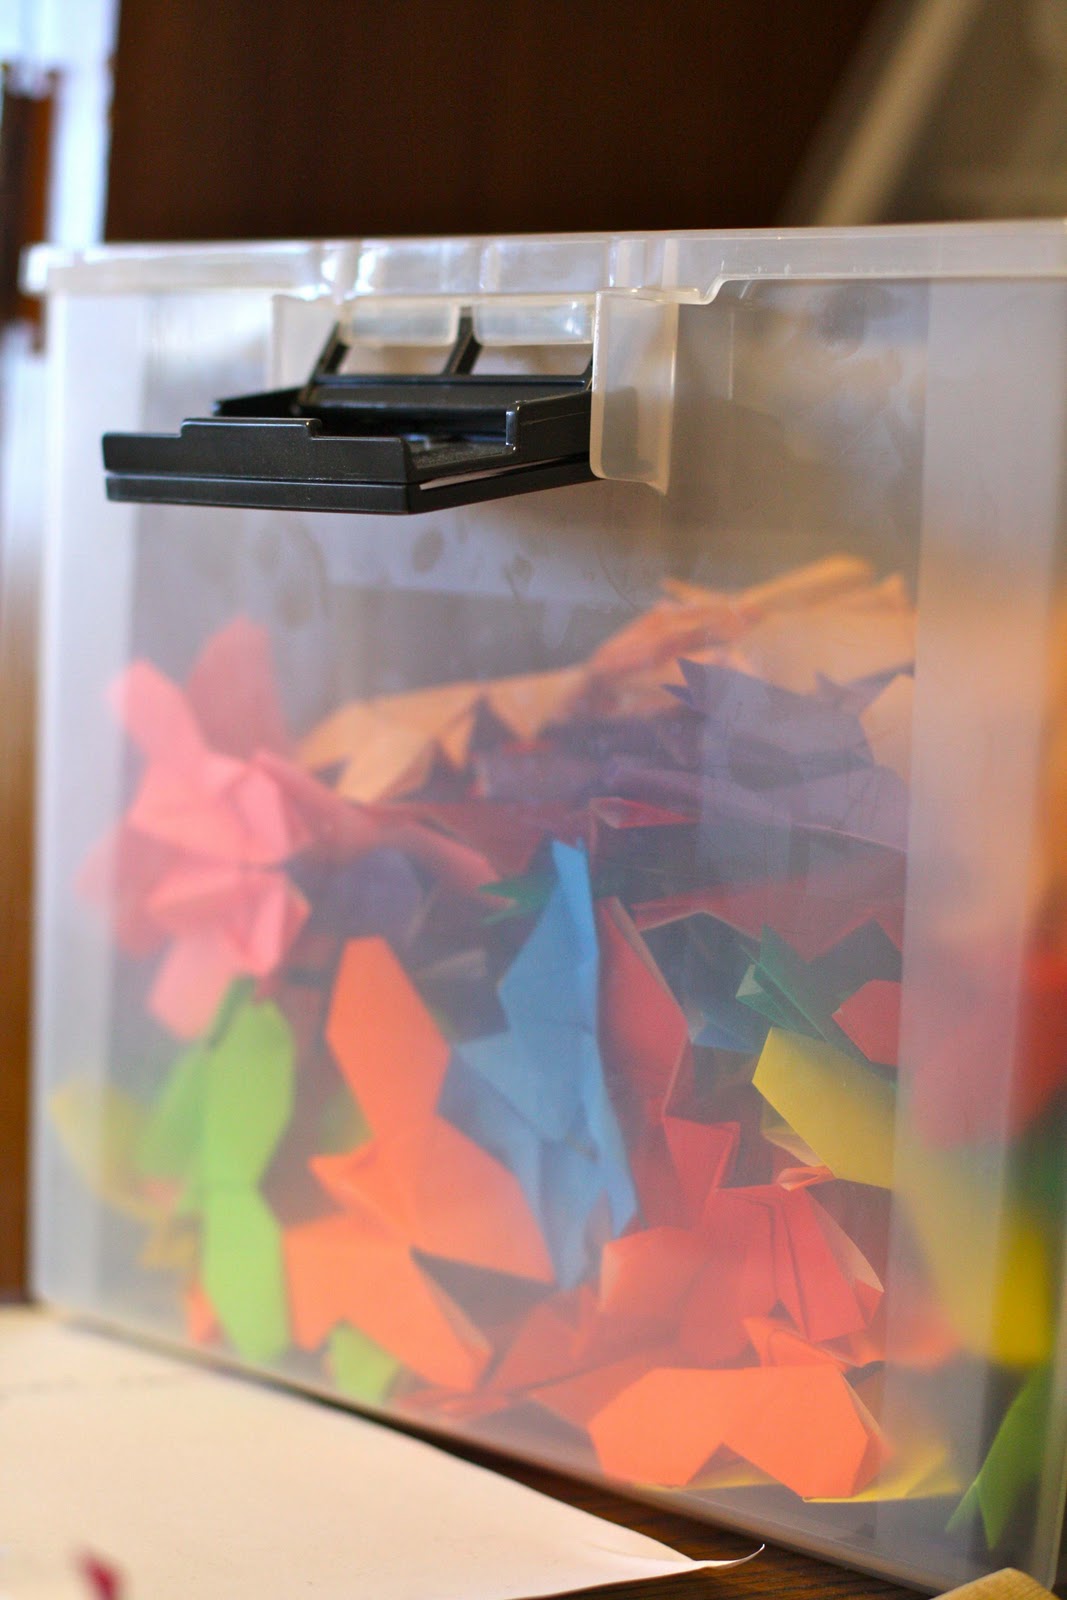
The box of over 200 folded origami butterflies...
all done by yours truly. 

Monarch caterpillar sleeping bags for kids to crawl around in-
aren't they adorable? They were really fun to paint, too.

I will miss working in Pacific Grove, with all of it's great people and small-town charm. However, I also can't wait to get back to school- did I really just say that? 
Yes I did. I'm a nerd. I love school.

You know what I also love? 


Nutella. 

My friends I'm staying with have a whole jar in their cupboard that looks so yummy, but unfortunately, this delicious chocolatey spread is definitely not vegan. Thanks to Chocolate-Covered Katie, however, now I can make my own! I cut her recipe in half and added a splash of extra soy milk because it was a little thick, but result was amazing. There is so much you can do with it! Spread it on bread, graham crackers, bananas, swirl it in oatmeal, bake with it... the possibilities are endless. Next time I will make a full batch- I could eat this stuff by the spoonful. 


I have an incredibly early flight tomorrow (leaving at 4am... gah), so I think a quick breakfast of toast and vegan nutella is in my future. Now that is something to wake up for.

Also, side note, That's So Vegan just joined Twitter! Follow me for updates on my vegan baking, cooking and life adventures.

27.1.12

Chocolate and Peanut Butter is for Lovers


Don't worry, I will have more fun stories about California and my internship coming up soon, but I wanted to take a quick break from that and talk about the holiday that is fast approaching...

I've been posting a lot about chocolate and peanut butter on here lately, but unless you happen to be deathly allergic to either one, I don't think there's anything wrong with that. Chocolate and peanut butter were a match made in heaven and therefor perfect for Valentines Day!

Now I may not have a significant other, but I am not one of those people who gets really depressed around February 14th because they feel so unloved. Excuse me, but who wouldn't enjoy a day where you can get together with your other single friends, watch bad movies and eat lots of chocolate? It's all about being with people you love- romantically or not. 


So, what better way to express your love for someone than by making them homemade Reeses peanut butter cups? You can find this fabulous recipe at Have Cake, Will Travel. The only alteration I made was to use powdered sugar for the filling instead of brown sugar. Oh, and make sure you reheat the chocolate while the peanut butter filling refrigerates- I had an incident involving rock-hard chocolate and a mini blowtorch. It was mildly dramatic.

Let me tell you, these babies were better than the real deal. Not only do they leave out the icky chemical stuff in the original candy, but they are made with delicious dark chocolate, stuffed with all-natural creamy peanut butter, and made (I assume) with a whole lotta love. 

Cut down the edges of normal cupcake liners to make them look pretty!


How do you feel about Valentines Day?

Here's a song for friends (obvious, I know),
and here's a song for your special friend :)

25.1.12

Berkley and Lillian's Shallot Spaghetti

love.

Well. I spent my weekend living in a house with my very liberal cousin and her 9 male, conservative, mormon roommates. How was your weekend?

Seriously, though, I felt like I was in the middle of a ridiculous sit-com or something! They were all super nice guys, but there were some semi-awkward debates about politics and a lengthly explanation of what exactly being a vegan means.  

Speaking of which, Berkley is like vegan heaven. Almost every restaurant at least had options for me, but some were all vegetarian or vegan. There is this ice cream sandwich shop called Cream that has vegan ice cream sandwiches. Oh. My. God. I got chocolate cookies with white chocolate chips stuffed with cherry chocolate chip soy ice cream and practically had a heart attack at the first bite. I would have taken a picture to try to show you how incredible it was, but it was gone within a couple minutes.

Sorry the photo quality isn't great- it was dark and there were no leftovers to photograph in the daylight!
My cousin and I also made a lot of our own yummy meals. This one we created from some random things we had on hand, but I wanted to share it because it was so amazingly good! Lillian said that one of her meal-time staples is to make pasta with caramelized shallots and garlic. The secret is to slice the shallots super thin and saute them slowly, so that they are soft and stringy and blend in with the texture of the pasta. We did a spin on this basic dish by adding mushrooms and parsley for a richer flavor. The measurements are not set in stone, so feel free to adjust them slightly to your taste- just don't skimp on the shallots! 

Lillian's Shallot Spaghetti with Red Wine Mushrooms and Parsley

serves 2

1/4 pack of whole wheat spaghetti
olive oil
6 shallots, thinly sliced
6 cloves garlic, minced
8 white mushrooms, sliced thinly
1/4 cup red wine
1 medium bunch of parsley
salt and pepper, to taste

1. Heat olive oil (enough to cover the pan) in a large skillet over medium heat. Add the shallots and half of the garlic and lower the heat. Saute for about 30 minutes or until they begin to brown. Stir occasionally to prevent burning.
2. While the shallots caramelize, heat a little bit of olive oil in a medium pan and add the rest of the garlic and the mushrooms. Once the mushrooms begin to cook, pour in the red wine. Stir and let simmer until all of the liquid has evaporated. 
3. Prepare your spaghetti according to the package directions. To serve, divide up the spaghetti among plates and top it with a generous helping of shallots, mushrooms and parsley. Sprinkle on some salt and pepper and enjoy!


We turned our meal into a whole feast, complete with a salad that we threw together from mixed greens, strawberries, and fresh-squeezed lemon juice, complements of her backyard lemon tree.


And a dessert plate, of course, with strawberries and yummy No-Cookie Cookies.


This is one of my favorite new pasta dishes- it tastes like a gourmet meal, but it is so simple!


Candles and red wine make everything fancier.

21.1.12

Puffy Peanut Butter Chocolate Chip Cookies


This weekend I'm really excited to take a little break from my internship and visit my cousin in Berkley. I've never been to the area before, but I can't wait to check it out! I'll be there for three days, then I work for one more week, and then it is back to cold and dreary Ohio... boo. At least I'm looking forward to seeing friends again and starting up some good classes for the semester! More about all of that later. Time to talk about cookies.

I actually made these cookies while I was at home. My dad is a peanut butter fanatic, so I like to make at least one treat for him while I'm in town. These have the consistency of a fluffier shortbread and are full of delicious peanut butter-y flavor, but of course my dad still insisted on eating them with some extra peanut butter smeared on top :)


Puffy Peanut Butter Chocolate Chip Cookies (recipe adapted from Just Everyday Me)

makes about 2 dozen cookies

1 1/2 cups all-purpose flour
1/2 tsp salt
1/4 tsp baking powder
1/8 tsp baking soda
1/2 cup brown sugar
1/2 cup earth balance
1/3 cup creamy peanut butter
1 tsp sugar
1 eggs worth of egg replacer
1/2 tsp vanilla
1/2 cup chocolate chips

1. Preheat your oven to 350º and line 2 baking sheets with parchment paper. Prep your egg replacer.
2. In a large bowl, whisk together the salt, baking powder and baking soda. In a medium bowl, cream together the earth balance and sugars. Then add in the peanut butter. Once that is fluffy, add the egg replacer and vanilla.
3. Add the wet ingredients into the dry and combine. You may want to use your hands so thats it's not too crumbly. Roll smallish pieces of dough into balls and form them into mounds on the cookie sheet.
4. Bake for about 10-12 minutes- do not over-bake or they will get too hard! Let cool for about 10 minutes and enjoy.


These cookies are especially yummy dipped into my favorite kind of tea.


Have a great weekend! If you have nothing else to do, bake these. You will not be disappointed. 

17.1.12

Taste & Create


Eat well, travel often.

This is my new life motto. I'll be completely honest... I found it on stumble upon. Doesn't make it any less important. 

Recently, I think I have been doing an excellent job following this saying. I have been taking walks to new places every day here in California and trying delicious food at farmers markets, mexican restaurants and in our own kitchen! 


Can I just live here now, please?

Both of these I took on a morning walk along the Monterey coast with my 1970s pentax
Now, onto the food. Funny story about making these cookies. This was my first time doing Taste & Create (a fun monthly blogger recipe exchange) and I was really excited to swap recipes with Kat from Study Food! I decided to try veganizing her chocolate oat spice cookies. Making it vegan wasn't a problem- I just swapped earth balance with butter and a flax egg with a real egg- the issue was accidentally reading the amount of flour as 1 tbsp instead of 1 1/4 cup minus 1 tbsp. I'm not sure why I thought that could be right... but I put the little oatmeal-y blobs in the oven anyway. When I saw that they were not doing anything except bubble and melt, I double-checked the recipe, saw my big mistake and quickly pulled them out of the oven. I ended up scraping all of the oatmeal mush back into the bowl and then adding in the flour, but since the chocolate chips had all melted they ended up as solid chocolate cookies instead of chocolate chip. Despite that whole ordeal, they turned out pretty well!


Oatmeal Chocolate Spice Cookies

makes about 2 dozen

1/2 cup earth balance
1/2 tbsp vanilla extract
1/2 tbsp water
1/4 cup brown sugar
1/4 cup granulated sugar
1 flax egg (1 tbsp flax meal mixed with 3 tbsp water)
1 1/4 cup whole wheat flour
1 tbsp cocoa
1/2 tsp baking soda
1/2 tsp nutmeg
1 1/2 cups rolled oats
1 cup chocolate chips

1. Preheat the oven to 350º and grease or place parchment paper onto two large cookie sheets. 
2. Whip up the earth balance with a fork until it is creamy, then stir in the vanilla and water. Add the sugars and cream until nice and fluffy.
3. Stir in the flax egg, then slowly add the flour, cocoa, baking soda and nutmeg. Mix well, then fold in the oats and chocolate chips (or stir in melted chocolate chips if you want just chocolate cookies!).
4. Roll about tablespoon-sized pieces of dough into balls and flatten them onto your prepared cookie sheets. Bake for about 8 minutes. Take the cookies out while they're still very soft- they will harden as they cool and you don't want them too crumbly! Let cool and enjoy with some milk, coffee or tea.


These are very unusual cookies. The chewy texture is great, but it took a few bites to get used to the strong nutmeg flavor. They definitely grew on me. The friend I'm staying with didn't like them at first, but had another the next day and said they were in fact oddly addicting and actually pretty tasty. They taste like fairly "healthy" cookies because of the whole wheat flour, so keep that in mind. However, it was a fun experiment! If you decide to make them, just make sure you do the smart thing and read all the directions and ingredient amounts before putting anything in the oven. Whoops. 


See what Kat from Study Food tried out from my recipes here!

15.1.12

Caramel Apple Upside-Down Cake


Well this is turning out to be one of the most random internships I could have imagined. Yesterday I spent all day folding origami butterflies for a monarch exhibit and scanning pictures of wildflowers from the 1940s. Today I folded more butterflies and cut out little magnetic pictures of plankton. 


Among these funny little crafty things I'm doing, I am learning some interesting stuff about the inner workings of museum curation and the collection of local natural history. Plus I get to go to the Pacific Grove monarch sanctuary and film and take pictures of the butterflies as part of my job... not too shabby!


When I'm not working, I'm off exploring Monterey, shopping at little thrift stores, and cooking and baking with my friends who are hosting me! My friend Maria, who is an expert baker and has even made award-winning cookies, has never actually tried vegan baking before. I knew I had to find an incredible recipe to prove that baked goods can be just as delicious without all the dairy and eggs. Angela's Caramel Apple Upside-Down Cake turned out to be the perfect thing.

Unfortunately, Trader Joe's does not carry brown rice syrup, so we used a different recipe for vegan caramel. The cake still came out amazing- everyone in the house was blown away!


Caramel Apple Upside-Down Spice Cake

For the caramel (adapted from The New Vegan Table):

1 cup sugar
1/4 cup water
2 tbsp maple syrup
1/4 cup earth balance
3/4 cup soy creamer
1/2 tsp vanilla

For the cake (from Oh She Glows): 

4 apples (we used sweet fuji apples- yum!), peeled and sliced thinly

1/2 cup earth balance
1/2 cup sugar
1/3+1/4 cup maple syrup
1 cup soy milk
1 tsp vanilla extract
2 1/4 cups all-purpose flour
1 tsp baking soda
3/4 tsp baking powder
1/2 tsp salt
2 tsp cinnamon

1. To make the caramel, stir together the sugar, water and maple syrup in a medium sauce pan over medium heat. Bring to a boil and let cook until it reaches 248º. Carefully add the earth balance and soy creamer and whisk quickly. Lower the heat and stir for about 2-3 more minutes. Remove from heat and let cool for about 5 minutes.

2. Grease a 9-10" round pan and once the caramel has cooled slightly, pour about 2/3 of the batch over the bottom of the pan. Place apple slices on top, layering them if necessary. 

3. Preheat the oven to 325º. With a mixer or by hand, mix the earth balance and sugar until fluffy. Whisk the wet ingredients together in a small bowl, and combine the dry in a medium bowl. 

4. Alternate adding the wet and dry ingredients to the butter and sugar, mixing well as you go. Pour the batter over the caramel and apples and spread evenly with a spatula. 

5. Bake for about 45 minutes or until a toothpick comes out clean. Let cool for about 10-20 minutes, then flip onto a plate and pour the rest of the caramel sauce on top. Serve and enjoy!


This cake is warm and comforting on a chilly day!


10.1.12

California Dreaming

Photo taken by my friend Anne Ylvisaker on her iPhone- unfortunately I left my camera at home on our walk today!

Every time I visit California, I realize this is where I belong. The air is so fresh, the sun is (almost) always shining, there are great places to get vegan food, and you can hear the ocean from everywhere. I always feel so rejuvenated, especially since I've been stuck in the Midwest for so long. After college, you can definitely count on me heading to the west coast. Just look at how beautiful it is here, how can you resist?! 

Also by Anne!

Because I'm pretty busy starting my internship with the natural history museum, I'll just leave you with a quick and easy lunch recipe that I made for my mom and I while I was home. It's from my favorite cookbook I mentioned before, Big Vegan. These wraps were super tasty and incredibly healthy!


Easy Veggie Tahini Wraps 

serves 2

1 1/2 cups broccoli florets
2 cups chopped kale
3 tbsp tahini paste
2 tbsp fresh lemon juice
1/4 tsp salt
1/2 cup halved cherry tomatoes
2 large spinach tortillas


1. Steam the broccoli and kale so that they become tender and bright green. Drain them and pat dry.
2. In a medium bowl, stir together the tahini, lemon juice and salt until smooth. Mix in the broccoli, kale and tomato halves. Warm up the tortillas in a toaster oven or microwave and fill them with the veggies. Wrap up and enjoy!


I think these are about to become a lunch staple for me.


I love listening to this song by the ocean. Excuse me while I go dream about dolphins and waves...

6.1.12

My Favorite Cake


I really love cake. So when I say this cake is my favorite, you know it's some serious business.
I don't think there's anything more romantic or heavenly than chocolate and cherries. Maybe chocolate and strawberries, but it's a close tie. This cake is moist, rich but not too rich, and will blow your mind at the first bite. Make this for that special someone and if they're not already in love with you, they sure will be now.


Chocolate & Cherries Cake with Rich Chocolate Frosting (adapted from Cookie and Kate)

1 1/2 cups whole wheat pastry flour
1/4 cup unsweetened cocoa powder
1 tsp baking soda
1/2 tsp salt
1 cup sugar
1/2 cup canola oil
1 cup strong coffee, cooled
1 tsp vanilla extract
1/2 tsp chocolate extract (or more vanilla)
2 tbsp apple cider vinegar
1 bag frozen cherries (thawed), or about 2 cups fresh and pitted

1. Make your cup of coffee and stick it in the fridge to cool down. Preheat the oven to 375º and line the bottom of an 8" or 9" round pan with parchment paper.
2. In a large bowl, whisk together the flour, cocoa, baking soda, salt and sugar.
3. In a measuring cup, mix the oil, cooled coffee, and vanilla & chocolate extracts. Pour this into the dry and stir until combined. 
4. Add in the vinegar and you will see little bubbles appear in the batter. Mix until the vinegar seems to be evenly distributed.
5. Pour the cake batter into your prepared pan. Sprinkle the cherries evenly over the batter and press them towards the bottom of the pan with your finger. Bake for about 40 minutes or until a toothpick comes out clean. Let cool completely before you frost it.


Frosting:

1 cup semi-sweet chocolate chips
2 tbsp soy milk
1/2 tsp vanilla extract 

Melt the chocolate chips in the microwave, or if you don't have a microwave like me, in a double broiler until smooth. Remove from heat and stir in the soy milk and vanilla. Spread frosting evenly over the cake and top with a sprinkling of powdered sugar. 


Just one bite...


Yum.


Put down whatever you're doing and go make this cake. Now.

On a completely non-cake related note... I'm going to California tomorrow for my College Winter Term project! I will be working at a natural history museum taking photos and setting up galleries for them. I'm staying with some friends who also love to bake and are excited to try some vegan baking with me. I can't wait to post recipes from the land of sun, surf and sand!